How to Get Onboarded to Alani AI: A Step-by-Step Guide
Welcome to Alani AI! This guide will walk you through the onboarding process, ensuring you can make the most out of this powerful AI tool. Whether you're looking to create content, conduct research, or manage data, Alani AI has you covered. Let's get started!
Step 1: Register and Select a Plan
First, you'll need to register for an account on Alani AI. Once registered, you'll be prompted to select a plan. Alani AI offers various plans, including a free plan to get you started. Here’s a quick overview of the plans:
- Essential Plan: 25 prompts, 250 pages
- Individual Plan: 200 prompts, 10,000 pages
- Team Plan: 1,500 prompts, 100,000 pages
To select a plan, simply click on the "Select Plan" button next to your desired option.
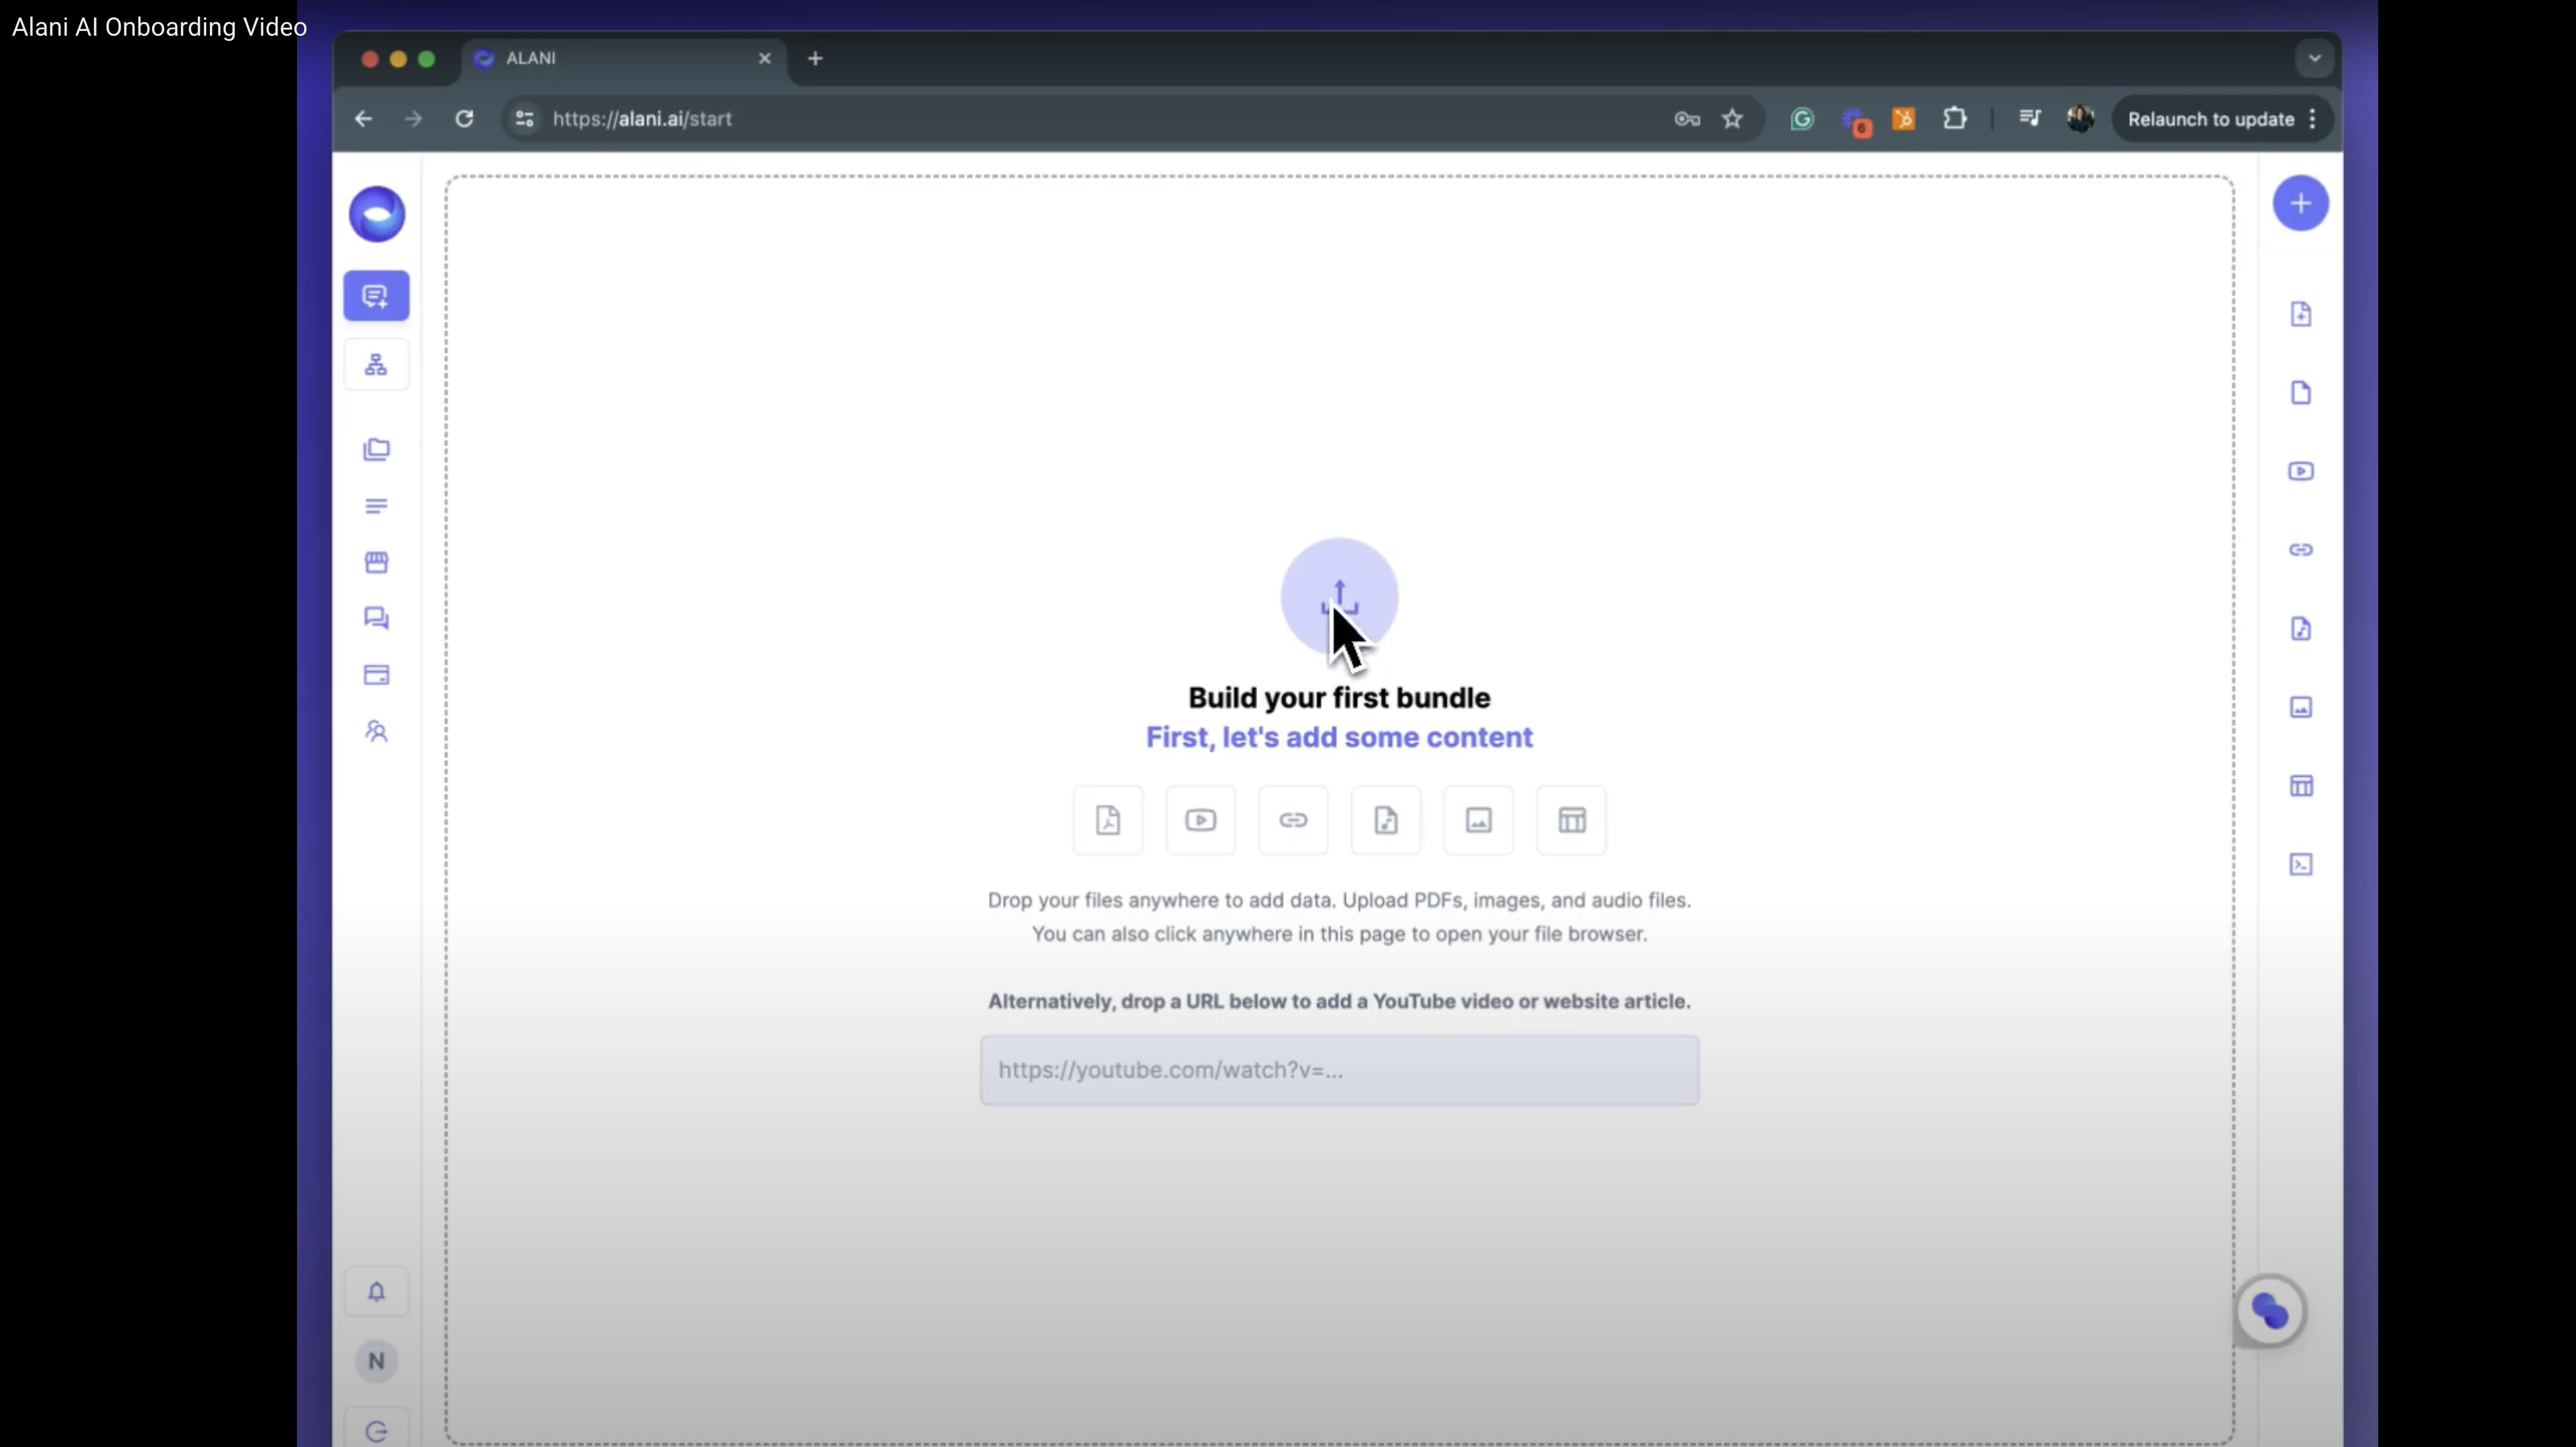
Step 2: Upload Your Data
Alani AI is most effective when it has data to work with. After selecting your plan, you'll be prompted to upload files. You can drag and drop files into the upload area. Alani AI supports various file types, including:
- PDFs
- YouTube videos
- Audio files
- Images
Once your files are uploaded, Alani AI will process the data in the background. This data will be stored in a new bundle that is automatically created for you.
Step 3: Explore the Marketplace
Alani AI features a marketplace where you can access pre-built bundles. For example, you can subscribe to a dataset like "Naval Ravikant" and start interacting with it immediately. This marketplace functions like an information app store, providing you with a variety of datasets grounded in a knowledge base.
Step 4: Understanding Modes: Research and Writing
Alani AI offers two primary modes: Research Mode and Writing Mode.
Research Mode
In Research Mode, Alani AI extracts insights from your data. You can ask probing questions, and the AI will provide responses with citations linking to specific pages within your documents. This mode is ideal for in-depth analysis and data exploration.
Writing Mode
Writing Mode allows you to create new content using the context provided by your data. This mode is perfect for generating blog posts, articles, and other written content. Unlike Research Mode, Writing Mode focuses on the context thread rather than the entire dataset.
Step 5: Adding More Data
If you need to add more data, Alani AI has an ingestion engine that supports various file types, including new file types like HTML and Markdown. You can continuously add data to your workspace, creating new bundles as needed.
Step 6: Start Chatting with Your Data
Once your data is uploaded and processed, you can start interacting with it. In the marketplace, select a dataset and begin chatting. Alani AI provides responses grounded in the knowledge base, and you can see where each piece of information is coming from by clicking on the citations.
Need Help?
If you have any questions or need further assistance, feel free to reach out to us at hello@bundleiq.com. We're here to help you make the most out of Alani AI.
Cheers!
By following these steps, you'll be well on your way to leveraging the full potential of Alani AI. Happy Bundling!

Ready to put your information to work?
Pick a product. Start free or talk to our team.